Hoshigaki: The Kobe Beef of Persimmons
Since my first exposure to them a few years ago, I have been obsessed with hoshigaki, the Japanese slow-dried persimmons. (You may even recall that I used them in a salad a while back.) I like dried fruit in general, but these are within a category all their own. Unlike the tart chewiness of dried apricots or prunes, hoshigaki are dense, meaty and rather subtly sweet.
They are also fantastically expensive.
As a person who's got more time than money on his hands of late, I spend more time than usual considering how I can take matters into my own hands, start with inexpensive raw materials and create something that would otherwise cost me more than I care to spend. Since persimmons are currently trending under three bucks a pound, I simply had to try my hand at making hoshigaki, which retail around a dollar apiece.
There's somewhat limited information out on the interwebs about making hoshigaki. Quite a lot of conversation, mind you, but little in the way of specific instruction. In part, I imagine this is because so few people are doing it in anglophone countries. But there's enough for me to intuit the major steps, and so certainly enough for me to take a stab at it. The worst that could happen is that I'm out a couple bucks' worth of fresh persimmons.
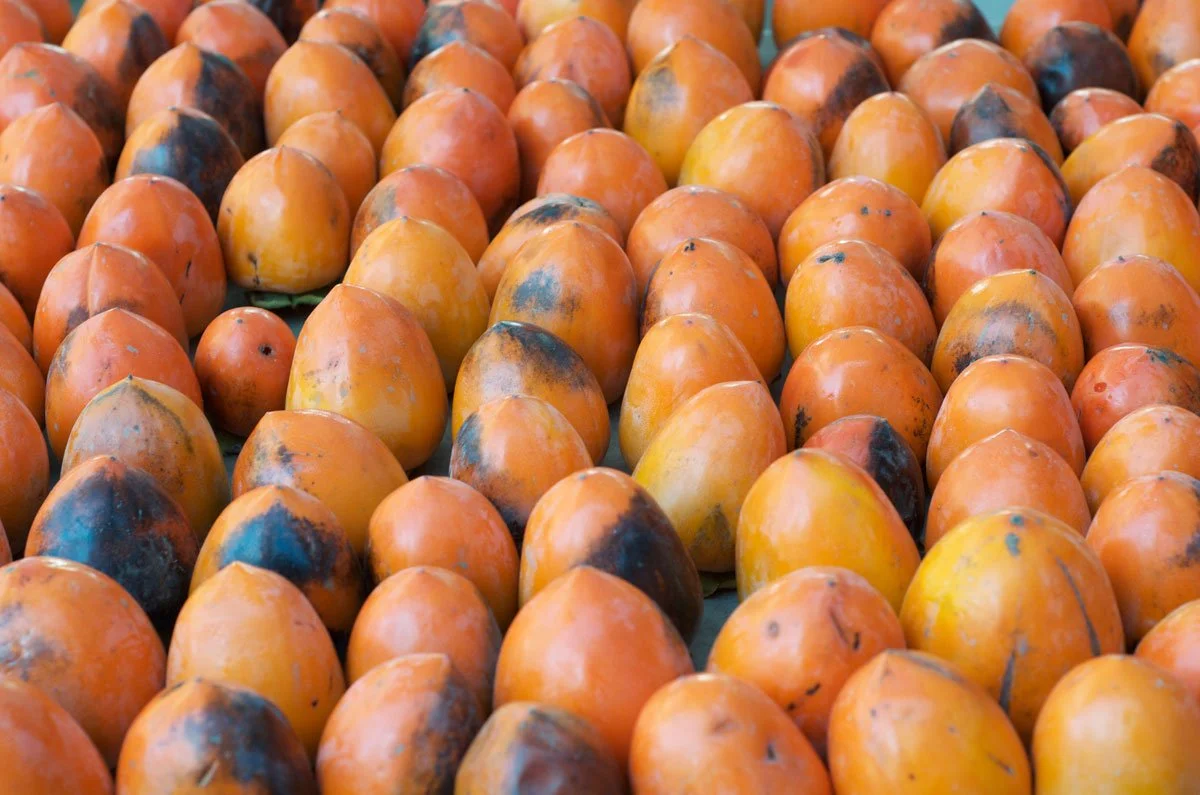
This much is abundantly clear: You start with hachiya persimmons, the elongated type that are normally left to ripen until the insides are as soft as jelly. However, you start this process with firm hachiyas. These are not edible in this state; the fruit is intensely tannic. Don't trust me? Fine, go ahead and take a taste. I'll wait.
Yeah, see what I mean? See how your mouth feels like it's been stuffed with wool and you get that bitter, almost metallic taste? Delicious, huh?
The good news is that aging the persimmons breaks down the tannins and mellows the fruit. But it will require patience.
Anyway, select fruit that has at least some of the stem intact, so you have something to tie onto. Trim away the sepals at the top, and peel the fruit completely. I find the best way is to peel a ring around the top, then peel down in broad strokes along the sides.
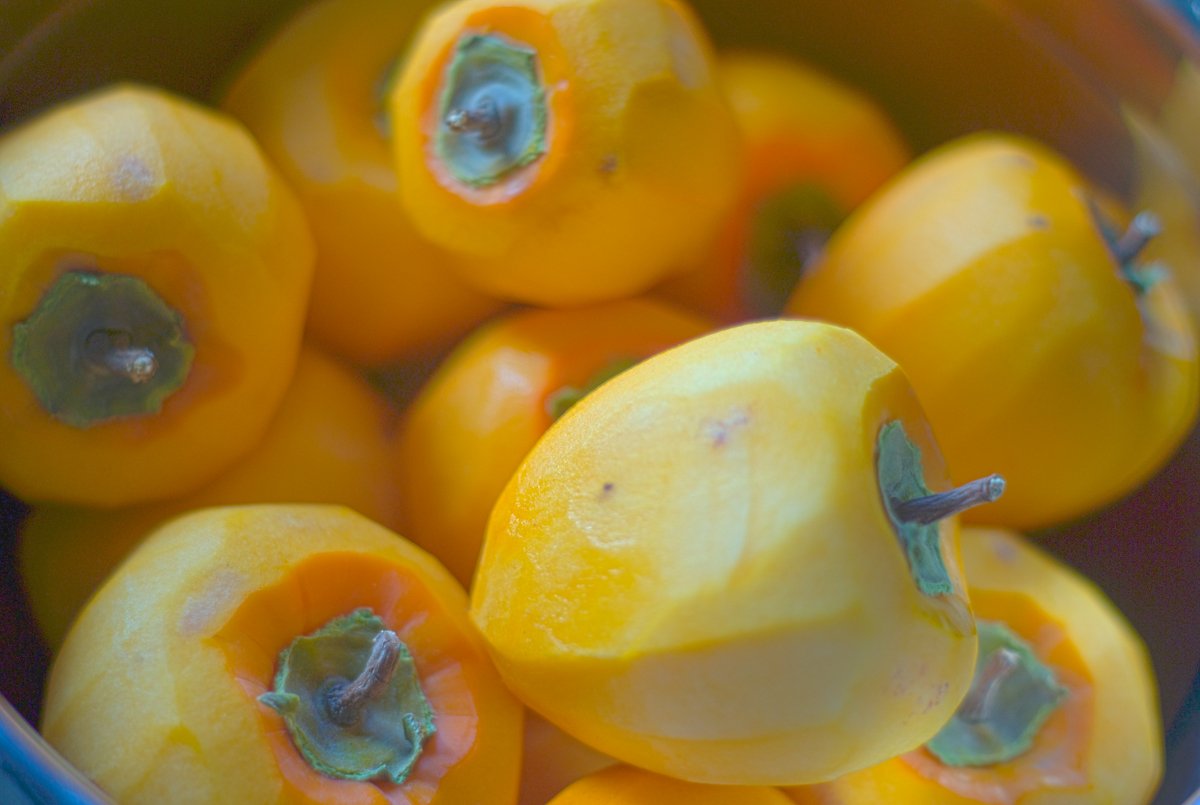
Be careful: The fruit's flesh is alternately slippery and sticky, and you're likely to jam the peeler into one or more digits during the process. Once the fruit is peeled, select a spot with good ventilation and protection from the elements. I've seen recommendations that it be a spot that gets some sun, as well. (I put mine in our basement ... hope the sun isn't a necessary factor.) Tie kitchen twine around the stems of the fruit and hang them, making sure they don't touch each other.
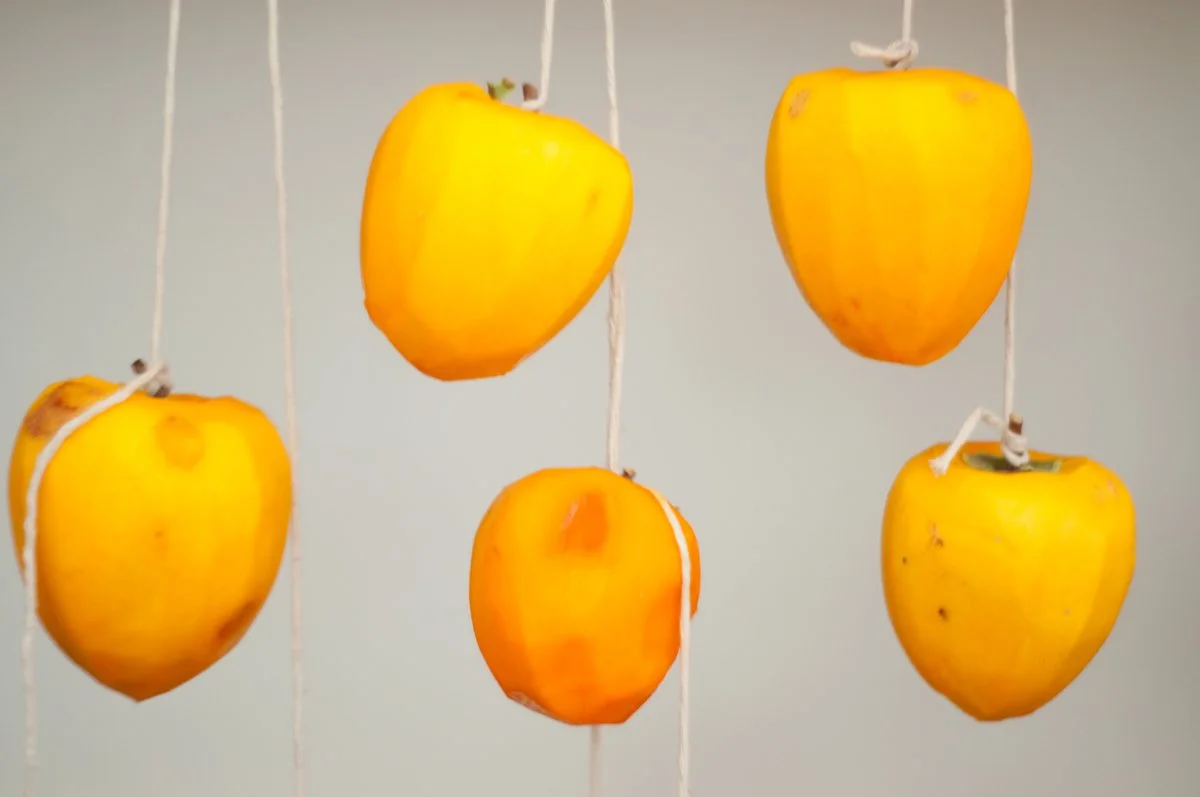
And wait. After several days, the fruit should take on a leathery exterior. Once that happens, every few days, gently massage the fruit to break down the cell walls within. Don't go all shiatsu on it; just a gentle squeeze or three to distribute the sugars and moisture will do. After several weeks, the fruit should be shriveled, dark and coated with a fine powdering of white sugar.
I just started this lucky batch of 13 persimmons the other day. I'll report back with progress. Hopefully they won't get eaten by ants/mice/my dog in the meantime.
Stay tuned!